
Showing posts with label Pretty Little Things. Show all posts
Showing posts with label Pretty Little Things. Show all posts
Friday, August 31, 2012
How cute are these?

Sunday, August 26, 2012
The new mermaid on the block

Of course before this one was even done, Moo was asking for another one and Toots was begging for a number 2 too. So now after a short break to let my hand muscles heal up (SO not used to that much hand sewing!!!) I will be making a number 2 for Toots. Then I think I will make Moo a boy mermaid for Christmas and one for Toots...a boy maybe? These are kind of quick little projects. Three days max, if you spread it out a lot. One day to cut pieces, one day to sew the parts and one day to sew it all together. That's how I have to do it with the girls constantly needing me, anyway. If I were alone for a day, I could probably make two in one day. So cute and so fun for the girls!
Sunday, April 22, 2012
Homemade Non-Easter Easter Dresses

Do you remember back in January I posted about some happy mail? That I got a package of fabric that I had ordered from Hawthorne Threads? Well I made dresses for the girls just in time for Easter! Yes, I know they aren't exactly Easter dresses...but I let Moo pick out her own fabric, then I picked out something kind of complimentary for Toots and since when I ordered them I was not thinking of Easter, this was not an issue. But since I had time and got a wild hair, I decided to bust them out in time for the holiday. Plus I've always wanted to make an Easter dress. Of course, it was freezing on Easter so the girls are wearing long sleeve shirts and Toots is wearing leggings too. I promise the dresses are not as sloppy as Moo is making hers look. I made Moos' first and followed the pattern exactly, gathered top and front pockets. Then I modified Toots' little dress to be easier/faster. I omitted the pockets because she doesn't need them and I actually like the cleaner look as opposed to the broken line the pockets make. I also did pleats instead of the gather along the yoke. I thought this would be easier, but I did have trouble keeping the pleats nice and neat while sewing. It was a faster set up to do the pleats, but totally easier to sew the gathers. A toss up, I think. There is a little button at the top/back of the dress which I was proud of since I have never done anything with a button before. The girls both seem to like their new dresses and I made them in sizes 7 and 3, so that they should last for a while ( I hemmed Moos' up after I finished it so that it would be the proper length. The main difference between the 6 & 7 was the length. It can be let out as she grows.)
Moo likes hers so much she wore it to Costco the day after I finished it. A woman with about 5 kids all under 10 asked if I made it. I told her I did, she said it was cute, then we went on with our shopping. After I had a huge inner dialog about why she would ask that? Does it look homemade? Is that a good thing? I thought it came out rather well and since Moo liked it so much I was pretty darn proud. But boy did that lady ever throw me for a loop. I never thought I would be bothered so much by something like that. Now obviously, I don't care if someone else likes the way I dress my kids or whether or not their clothes come from my machine or Target, but I hope that kind of thing doesn't rub off on the girls. I hope they always like wearing the things I make them. I hope they always think of how much time and love went into those items...so much more special than a $10 dress from Walmart. But I guess we'll see in a few years...
By the way, the fabrics are from Hawthorne Threads and the dress pattern is the Ice Cream Social Dress from Oliver & S. In case you were wondering.
Tuesday, February 7, 2012
Moo's New Haircut
 |
| Before |
 |
 |
| After |
Haircut a la Mom. I think she likes it, thank goodness. I tried to talk her out of it for a long time because I thought she'd regret it since she LOVES having long hair to do fancy hairdos with. But she's had her hair like this for about a month now and she really seems to like just throwing on a headband in the morning instead of me spending half an hour brushing through the long tangled jungle of hair before school. She looks SO grown up now! The before was taken right before Christmas, not too long ago but look at the difference! I think I might try to keep it like this, even if it does make her look ready for college. What do you think?
Wednesday, January 11, 2012
Happy Mail!!!
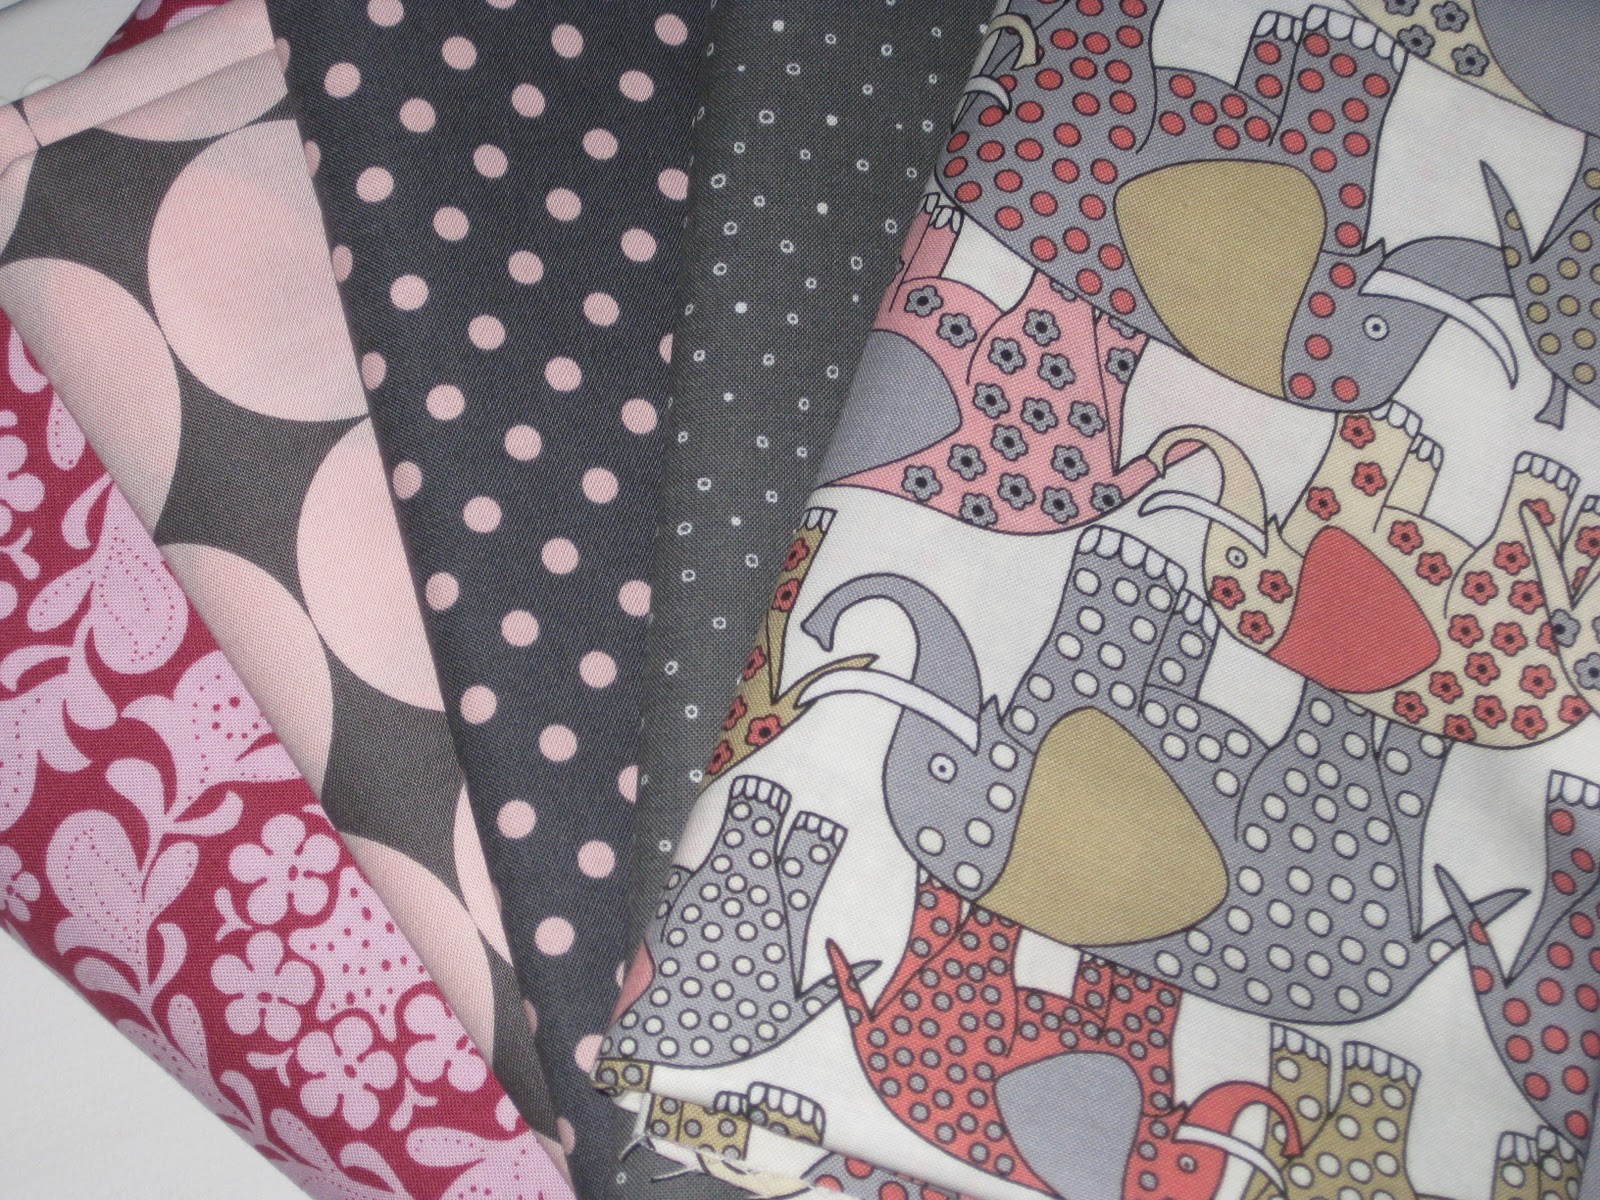
*Fabrics were purchased from my new favorite fabric store Hawthorne Threads! Check them out, they carry some SUPER cute fabrics!!!
Sunday, December 25, 2011
Handmade Mermaids
 |
| A few months ago I found the directions for these cute little handmade mermaid dolls from Wee Wonderfuls and found a free tutorial. Of course, I can't find that tutorial now so I just posted a link to Wee Wonderfuls so you can see all of her wonderful stuff. So creative that one. |
 |
| So after deciding that I just had to make them, I, well, made them. Actually, I waited until closer to Christmas, since I am really trying not to give the girls gifts just because. So I bought the fabric, followed the directions that I had printed out weeks before and worked on them slowly. S-L-O-W-L-Y. I had to wait until Moo was asleep AND Daddy was home to hold Toots, since she is not a big fan of sewing machine noise. A little bit here, a little bit there and some sewing machine problems (I still have no idea why the machine decided to change tension on me in mid fin) I finally finished late night Christmas Eve. |
 |
| Cute, right? The one with the blue hair belongs to Toots and the pink belongs to Moo. They came out pretty good, if I do say so myself. And I was afraid that I would have spent all that time on them and nobody would want to play with them, but Moo seems to like them well enough. Toots is still not too interested in dolls, but she did carry it around for a while. |
 |
| Mermaid in stocking. They were just too cute - no wrapping required. |
 |
| Seems to be enjoying her new mermaid. Here you can see the size, perfect for little hands. Not so perfect for bad eyesight and hand sewing. It was about 50% machine and 50% hand stitching, and my big meaty hands are not meant for delicate stitching! But in the end, it all worked out and now the girls have some cute little dolls. Moo even asked if I could make her another one so her mermaid could have a friend. I think that means it's a hit. I told her I'd make her one for her birthday (in March) and that she could pick out the fabrics. She should have loads of fun with that project! |
Making Ornaments with Moo
 |
| Moo and I decided to make some ornaments after seeing Meg over at Whatever with her SUPER cute flower pearl pin ornaments. So we headed out to the craft store and picked up one of those bottles of scrapbooking flowers, pearl headed pins and I already had some styrofoam balls from some other project. I put the bits in a crafty tin (a plastic muffin tin) and we got started! |
 |
| Moo picked out the colors, we both used pink flowers since one of those jars could easily cover more than two balls. Then she picked pink pins and I picked white. I just thought it would be nice to have a little contrast, but it turns out one box of 100 pins covers basically one ball - depending on how many flowers you try to stuff on there. |
 |
| I was a little worried at first and hesitant to do this craft with Moo, since it does use long head pins and it requires a lot of patience, which Moo doesn't really have. I finally figured that we could just stop when she got tired of it and pick it up again later. And I had her put the ball in one of the open spots on the craft tin while she was sticking the pins into it, so she would be less likely to stick herself. As you can see, she really enjoyed herself. |
 |
| She was extremely careful and placed each flower on the ball in just the right spot before pinning it in. We discovered early on that it is kind of hard to remove the pins once they have been pushed in. I was worried about how easily they would come out - I didn't want them to just drop out on the floor with the baby running around, so I tried it out. Pretty hard to pull them out when you are really trying, so that was good. It's also harder than you would think to push them in there. |
 |
| Moo really concentrated and kept at it until her ball was totally covered. I was very surprised at how focused she was on this activity. Probably due to the fact that every two seconds I was telling her what a good job she was doing, how pretty her ornament was looking and how grown up she was to be using very sharp pins so carefully. |
 |
| Her focused face. I don't see it often, had to capture it. By the way, she is still in her jammies since this was about 9 a.m. but she had to "fix her hair". This is how she did her hair for the day. |
 |
| The finished product. Very cute if I do say so myself. Sorry it's a little blurry, I was using the bad camera and had to turn the flash off since it just whited everything out. The flowers came in a few different shades of pink and some had glitter on them. Moo loved her ornament and was VERY proud to show it off. All in all it was a great project that we just might do again in a different color. Thanks Meg for the great idea! |
Friday, December 16, 2011
Teacher Gift Idea
 |
| If you have a teacher to give a gift to this Christmas (or this would also work for an end of the year gift), then have I got the gift for you! The Teacher Survival Kit! I saw something similar to this on a few blogs and thought I could tweek it to fit Moo's Kindergarten teacher - who is a Saint, by the way! |
 |
| You just get a jewelry supply organizer, tackle organizer, anything with a bunch of small cubbies in it that closes securely, then go to town filling it with things you think your teacher would need and appreciate! I went with a red, white and black theme, but you don't have to use a color theme at all. I just liked the look of everything matching. I went with Sharpies, pencils, large and small paper clips, binder clips, rubber bands and magnets. I also added a headache medicine (after a day with 30 5 year olds, I would need those), some chocolates (because they are yummy!), some breath mints (mainly because they were red, white and black) and some heart stickers because she gives the kids a sticker when they are leaving if they were good in school that day. An easy way for the parents to see if they kid acted up or not. |
 | |||
| Then I got a cellophane bag and some ribbon and there you have it! I also added the apple post-it dispenser because she is ALWAYS sticking post-its on everything and every teacher needs an apple for her desk, right? So cute. This gift was not too expensive to put together, but making two or more would be more cost effective, as I was left with a bunch of paperclips and chocolates and such that wouldn't fit in the bins. So make one for each of the teachers in your life and spread some love this Christmas! |
Saturday, September 24, 2011
I Won an AWARD!?!?!
Wow, can you believe it? I won something for this blog! I know, I can't either. But The Fearless Farmgirl just gave me one! She has such a fun blog to read, but I don't get the chance to get over there as often as I like. Lately, Moo and Toots have been so crazy (with school and teething, respectively) that I can't even seem to fold the laundry that is sitting in a huge pile on a chair in the corner of my bedroom. Sigh. Anyway, I stopped over there the other day and found that she had given me this award!!!!

Pretty cool, huh?
"Liebster" is a German word meaning dear, sweet, kind, nice, good, beloved, lovely, kindly, pleasant, valued, cute, endearing, and welcome.The Liebster is awarded to spotlight up and coming bloggers who currently have less than 200 followers.
Well, I have WAY less than 200 followers, that's for ding dang sure. But to those 10 of you out there...and I'm serious, I have 10 followers, I'm so glad you check in with me from time to time. Being a stay-at-home Mom can be challenging sometimes when you feel like there is no one to talk to. I mean sure, I can talk to Moo about Dora til we're both blue in the face. And Toots and I can talk gibber-jabber for hours on end. But when the Hubby comes home from work, the last thing he wants to do is hear me go on and on about what I saw on t.v. or how I'm thinking of coloring my hair, or how I just read in InStyle about this new nail polish that has real metal flecks in it and a magnet in the lid of the bottle so that after you paint your nails (while they are still wet) you can run the lid over them and create really cool ripple effects. Seriously, I just read that an hour ago in InStyle. I may have to venture out to find this mythical nail polish at some point. But I think I'm getting off track...
So since I got this award from FF (Fearless Farmgirl), which you should totally go check out using the link above, I have to follow the rules of the award and pass it on. I have to pick 5 blogs to win this award that all have less than 200 followers. This could be hard, because I read a ton of blogs, but I have never looked to see how many followers they have! So here I go to find my favs. (current favorites, that is, I love you all!)...
Oh, and here are the other things I must do, so you who win this lovely award after me will know what to do as well. You must...
1. Thank the giver and link back to their blog. Done.
2. Reveal your top 5 picks and let them know by commenting on their blogs. Doney-Done.
3. Copy and paste the award on your blog. DONE!
4. Have faith that your followers will spread the love to other bloggers. Hmm....Just kidding! Done.
5. Have fun! Done and DONE!
So here we go with my top 5! Drum roll please....
(p.s. click on any of the winners names to go to their blogs)
Cattle & Cupcakes! - I love checking this blog. As a Mom with a baby, I love all things baby and she has the most adorable little baby girl on the planet, second only to my own. Come on, you knew I had to say that right? I really like the posts about products she and Annabelle like. I can always use a good review!
Heather Ann! - Heather is my bestie and I love checking in on her blog. She puts so much of herself on there it amazes me. Sometimes I feel like so much of the blogging world is rather superficial (what I did today, what color I painted my nails, etc.) but she always has something deeper to comment on.
Crafty Mama of 4! - I don't think I need to explain this one. Crafty, party of one? Your award is ready! Now technically, she has less than 200 followers, although her Facebook page is a LOT bigger than that. But we're just going with blog followers, right? Anyway, I love this blog - check it out.
Itchin' Stitchin'! - Ok, technically, this blog has just over 200 followers, but I just love it and I had to give her this award. She and her kids are just so cute and she is so creative! I love seeing the projects she posts about and I wish I could make cute little bags like hers.
Green Owl Crafts! - This chica is seriously crafty. SERIOUSLY. And she's always giving away free printables and posting about things she is adding to her Etsy shop, which is also great, in case you were wondering. Check her out, but make sure you have lots of paper, ink and a few dollars for the Etsy store!
Well there you go! Five blogs I love that have now, won awards! Yipee! So go forth winners, and spread some love!!!
Saturday, September 10, 2011
Room Re-do
 |
| Here's a good idea you can use too. If you want to re-do a kids room into a more "grown-up" kids room and are sure that they will change their minds about decor a zillion times before they leave the nest, use inexpensive stuff. Also use stuff that is not an age definer. Example, do not go top to bottom Dora the Explorer! In a year, Dora will be old news and you will be re-doing your re-do! Try instead to focus on something they like, but in an off angle. Moo LOVES My Little Pony, so I went to the craft store and found these $5 paint by number horses. We will frame them in thrift store over the top gold frames and hang them in the room. We are also using mix & match floral sheets. When you enter this room, you won't know how old the girl who lives here is...well, as long as the toys are put away. We channeled her love of ponies into horse art that will work well beyond her My Little Pony phase. Much more likely to stick around that way. Just a thought. I'll post pictures of the room when it's done, but hang in there for the long haul folks, because I think this re-do is going to take a LONG time. Too much other stuff going on, but I'll be working on it bit by bit and it will get done eventually! |
Wednesday, August 24, 2011
A Very Vintage Bridal Shower
 |
| The table was long enough to comfortably hold 16, so the centerpieces were spread out down the center. The Bride is a Professor of Literature, so vintage books were held open with keys from my Grandfather which tied into the theme, "He's got the key to her heart..". The table was so long we couldn't find a single cloth that worked, so instead we found reproduction vintage sheets and draped 3 across, sticking with a light pink/light blue color scheme. We also didn't have enough of one single set of china to use for everyone, so we mixed up four place settings from our Grandmother's china, my Mother's china and the Bride's Mother's china. We did the same with the silver. It gave the table a very cute vintagey mix & match look. You can also see the favors, which doubled as placecards. I filled jelly jars with Hershey's kisses, covered them in a coordinating fabric, tied them with ribbon and added two tags. One had the name of the guest and the second, hanging right behind the first, said "The key to a good marriage is lots and lots of kisses!" once again tying in the "key" theme. |
 |
| The kitchen island served the food. We had 3 types of little sandwiches on mini-croissants, broccoli slaw and fruit salad for lunch. Then as the guests watched the Bride open gifts, we swapped out the lunch spread for the dessert spread, which you can see in the pic above. We kept it simple by picking up some of the Bride's favorite varieties of See's candy, plating all 4 types on their own plates. Then I made some Madelenes, one of the Bride's favorite and some white mini cupcakes topped with a dollop of lemon curd and topped with tiny marshmallow flowers. We made the small cake on the pedestal simply as decoration...but also in case we ran out of cupcakes. I'm really bad at guessing how much food people will eat! The apothecary jars were filled with strawberry cheesecake taffy (because it was pink) and malted strawberry milkballs (also because they were pink). |
 |
| My brother and close friend/cousin to the Bride, who acted as our bartender for the event. For beverages we set up a Mimosa Bar. There was Champaign and Diet Sprite for a base, then we had frozen cubes of orange juice and berry punch (both frozen concentrates from the store). We put a frozen cube in the bottom of the glass and poured the base over it for a cold, refreshing drink! It worked out well and everyone seemed to enjoy them! |
 |
| The gift table, before the guests arrived. A few balloons, a potted plant tucked inside a gift bag for color and our gifts. My Mother (the floral), my Brother (the white), Moo and Toots (the brown and pink) and mine (the Cross-stitch which I didn't wrap so we could use it as decoration since it was in theme). |
 |
| Another thing we did for the Bride. I included a tag with every invitation that said "The key to a happy marriage is..." and asked the guests to fill them in and bring them to the party. Of course there were extras for those who forgot, then they all went into this apothecary jar for the Bride to take home. We thought it was a sweet way for everyone to share little bits of marriage wisdom with the couple. |
 |
| The Bride and Moo. While she opened her gifts, Moo was given the very important job of making the ribbon bouquet for the Bride. With some help from the Maid of Honor (who just happens to be Moo's favorite cousin), the end result was just beautiful! |
 |
| Moo was quite excited to be included in all the party prep and the party itself. She even got to have coffee with her dessert, just like all the grown-ups. Don't worry, it's just milk, but she did get to drink it out of a real teacup. Moo and Toots were the only kids at the Shower, since I'm the only one with kids (so far), but I think they did very well. My Mom and I had a lot of fun throwing this shower for our sweet cousin (well, my sweet cousin, her niece) and we can't wait for her sister to tie the knot so we can do it again! I'm thinking nautical... P.S. I know there's not a lot of pics posted here, but that's because all of the other ones I took have lots of guests in them and I didn't want to post them without permission. I know I hate seeing photos of me that other people post (they always seem to be bad!) So out of respect for the guest, I didn't post any. Sorry! |
Sunday, July 10, 2011
Bridal Shower Sneak Peek....
 |
| Hmmm......What could these be for? Why a perfectly charming, vintagey themed Bridal Shower, of course! Can't give away too much though, the Bride might be watching... |
Monday, July 4, 2011
Happy 4th of July!
 |
| What can I say? It's well over 100* outside so we're stuck in here trying to be as patriotic as possible. I'm really feeling the crazy nails right now. American Flag inspired fingers as modeled by Moo. |
 |
| So is Moo. She just loves them. |
 |
| Moo has decorated herself for "America's Birthday Party" |
 |
| Happy Independence Day! And Happy Birthday America! |
Sunday, July 3, 2011
Rainbow Nails
 |
| Thank you Sally Hanson for your beautiful rainbow or summer colors! |
 |
| Moo loves her colorful fingers and toes. Hello summer! |
Friday, July 1, 2011

Saturday, June 18, 2011
Reading Teepee
Earlier today I was searching the blogosphere when I happened across this little gem. I found a picture and a link to a site called tatertots & jello about a cool summer reading teepee. Super cute idea! I clicked on the link and it was just awesome!!! I think I will add this to the ever growing list of things I want to make to put in the girls' playroom since it seems to also appeal to the older kids as well. Just click on the link to go on over and check it out. On a side note, I'm going to be checking on this blog now too. Anything involving bunting, red & aqua and cute DIY is alright by me!
Saturday, June 4, 2011

Wednesday, March 30, 2011
Sheep
 Someday I will have sheep. I will look out of my kitchen window and see this. Shady trees, green meadow grass and sheep. That is all.
Tuesday, March 1, 2011
Thrift Store Decor
 As you can see, I'm in the middle of painting my bedroom, so bear with me. I just wanted to share this little snippet with you. I know many of you have seen this idea on a number of decorating shows or magazines, but it really is a fab idea. For anywhere from $0.25 to $5.00 (or more, really) you can find cute little plates, saucers and trays at your local flea market/thrift/antique store and hang them on your wall to add a bit of interest and color to a blank space. I refuse to pay more than $2.00 for a plate, so none of the ones pictured here were more than that. I also prefer the kind of freeform look that hanging them as I go creates. I think the wonky shape is a bit more visually interesting. These hang above my rocking chair in the corner between my bed and the crib and I just love them. The Hubby isn't too much of a fan, but they aren't on his side of the room, so he says they can stay. Yipee!
$15 Fine Art
 I have been looking for something to hang in our bedroom, above the baby crib which has an entire blank wall all to itself. Since it was going near the crib, I wanted it to be safe (we do live in earthquake country) and pretty to boot. When I couldn't find anything pre-made that fit the bill, I started thinking outside the box. So when I saw this paint-by-number kit (yup) at the craft store, I used my 50% off coupon and got it for $5. It kept me entertained for a few weeks, painting it here and there as I had the time. When it was finished, I went back to the craft store and bought a cheap mat and empty frame that you are supposed to have the professionals use to frame your work for you. Since it had no backing and no glass, it was only $10! So I took it home, used my good friend Duct Tape to hold it all together and viola! A very light, shatterproof piece of art for about $15! The colors are perfect for our room and I made it myself! Well, I followed the directions myself, same thing.
Subscribe to:
Posts (Atom)